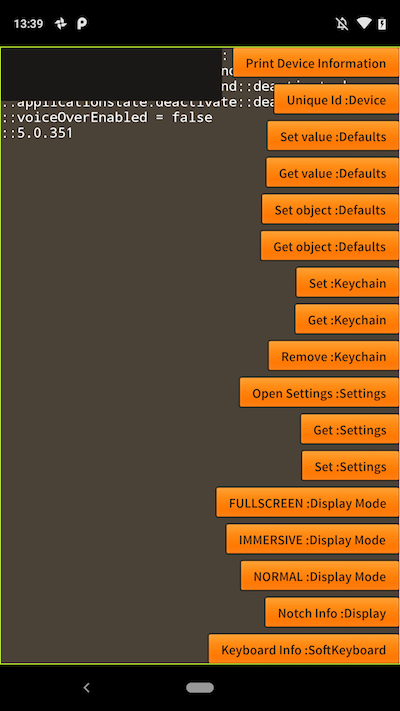
Display
This is only applicable to Android currently as these modes don't have an equivalent on iOS.
Display Modes
Display modes allows you to control how your application displays the user interface decorations such as the status bar and navigation bar.
There are several main display modes defined in the DisplayMode class:
DisplayMode.NORMAL: Shows both the status bar and navigation bar;DisplayMode.FULLSCREEN: Shows the navigation bar and hides the status bar;DisplayMode.IMMERSIVE: Hides both the status bar and navigation bar, the user can reveal them with a swipe.
In order to set the display mode, you use the Display class and call the setDisplayMode function:
Application.service.display.setDisplayMode( DisplayMode.FULLSCREEN );
IMPORTANT: You must set the
fullscreenflag in your application descriptor tofalsein order to disable the AIR fullscreen mode and allow the native code to work correctly. Without this AIR will affect the display mode and keyboard information.<initialWindow>
...
<fullScreen>false</fullScreen>
...If you set this to true then we cannot guarantee the display modes will work correctly.
RECOMMENDED: We suggest you pass a reference to the stage through to the ANE to be able to control certain aspects of the stage automatically for you and to change the
displayStateautomatically on unsupported platforms.Application.service.setStage( yourStageInstance );This is also useful to allow the ANE to control the stage display state on
Layout Modes
Modern devices are moving towards smaller bezels and larger aspect ratios. On these devices, display cutouts or "notches" are a popular way to achieve an edge-to-edge experience while providing space for important sensors on the front of the device.
We have two main options when displaying our content around cutouts, and how it will appear will depend on the display mode you are using.
LayoutMode.CUTOUT_SHORT_EDGES: The window is allowed to extend into the cutout areas;LayoutMode.CUTOUT_NEVER: The window is never allowed to overlap with the cutout area;
To set the layout mode, pass the required mode as the second parameter to the setDisplayMode() function:
Application.service.display.setDisplayMode( DisplayMode.FULLSCREEN, LayoutMode.CUTOUT_SHORT_EDGES );
These modes mainly have an effect in fullscreen or immersive modes where the view has the potential of displaying around the cutout.
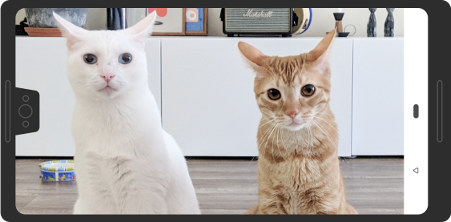
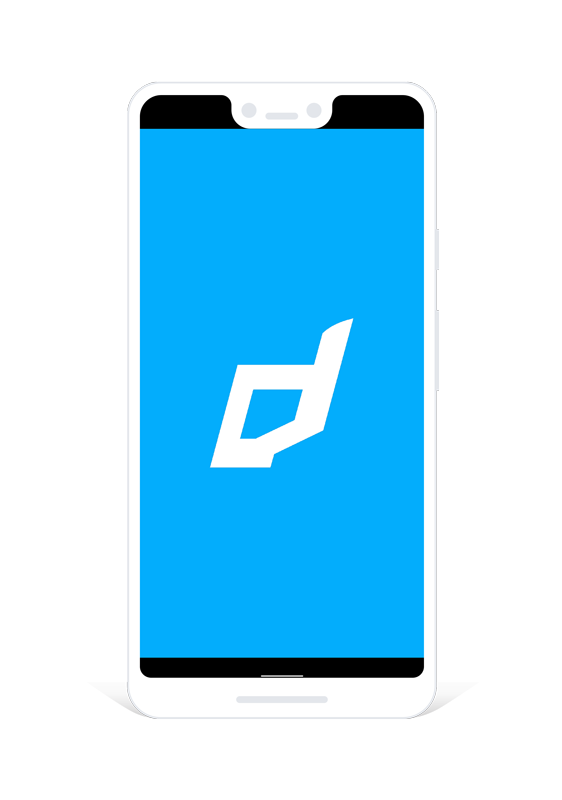
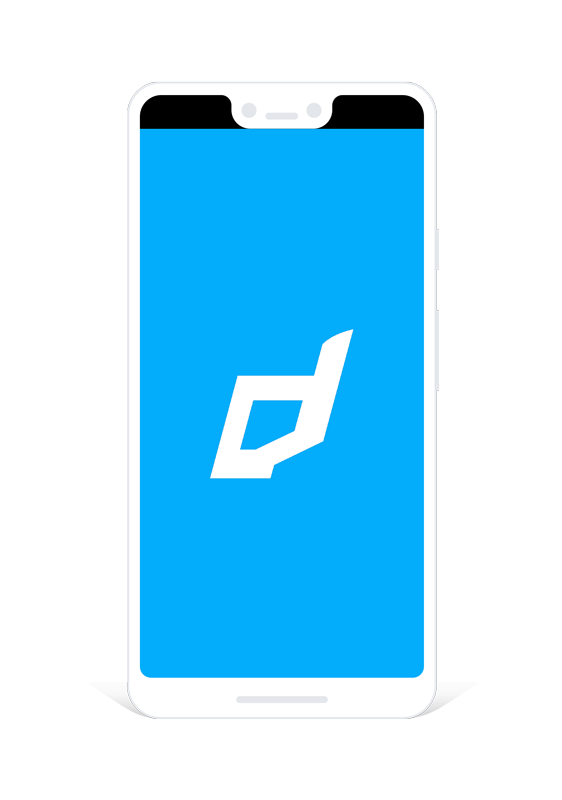
Eg The following screenshots so the differences when using the various modes:
Application.service.display.setDisplayMode(
    DisplayMode.NORMAL
);
Application.service.display.setDisplayMode(
    DisplayMode.FULLSCREEN,
    LayoutMode.CUTOUT_NEVER
);

Application.service.display.setDisplayMode(
    DisplayMode.FULLSCREEN,
    LayoutMode.CUTOUT_SHORT_EDGES
);
In order to render your content around the cutout see the documentation on getting information about the Cutouts.
Examples:
Application.service.display.setDisplayMode(
    DisplayMode.FULLSCREEN,
    LayoutMode.CUTOUT_SHORT_EDGES
);
Application.service.display.setDisplayMode(
    DisplayMode.IMMERSIVE,
    LayoutMode.CUTOUT_SHORT_EDGES
);
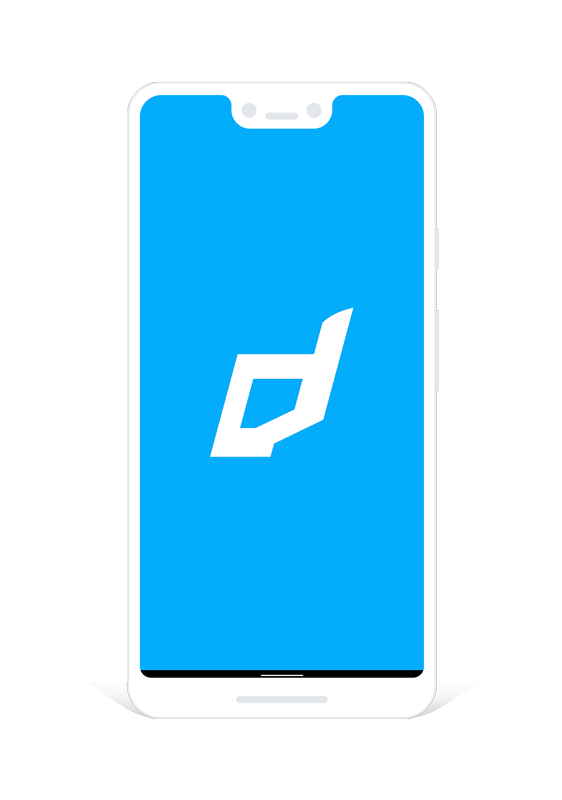
Aspect Ratios
As devices change in size we have seen a change in aspect ratios. You may encounter black letterboxing on some Android devices with your AIR application. For example, the following image is from a Google Pixel 3 XL with fullscreen flag:
In order to resolve this, simply add the following tag inside the application in your manifest additions of your application descriptor:
<meta-data android:name="android.max_aspect" android:value="2.5" />
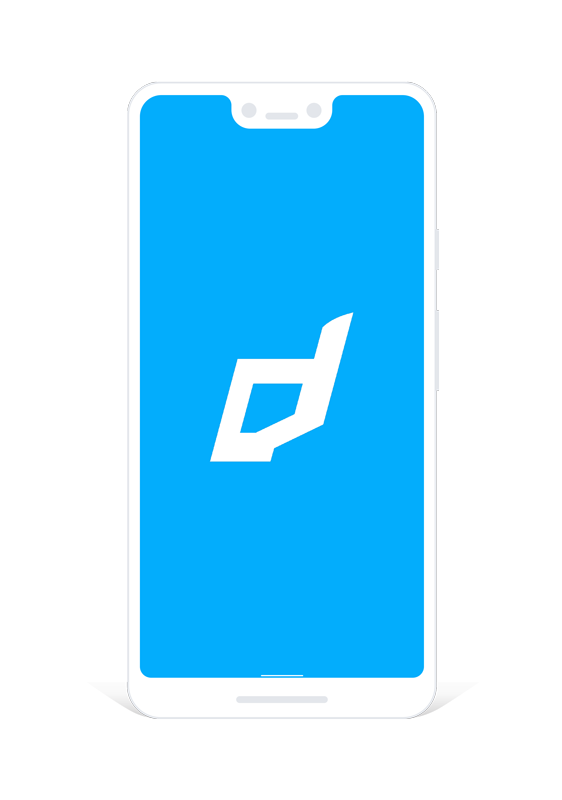
This image still has a black area at the top due to the cutout.
To resolve this you will need to use the the methods above eg:
Application.service.display.setDisplayMode(
    DisplayMode.IMMERSIVE,
    LayoutMode.CUTOUT_SHORT_EDGES
);
Ensure you place this within the application tag eg:
<android>
    <manifestAdditions><![CDATA[
        <manifest android:installLocation="auto">

            <uses-sdk android:minSdkVersion="14" android:targetSdkVersion="28"/>

            <uses-permission android:name="android.permission.INTERNET"/>
            <uses-permission android:name="android.permission.WAKE_LOCK" />

            <application>
            </application>

        </manifest>
    ]]></manifestAdditions>
</android>
If you encounter this on iOS then most likely you are missing the launch storyboard or a "Default.png" matching the resolution of the device.
Migration from v4
Previously you called setDisplayMode on the main application with a value from the ApplicationDisplayModes class. This functionality has been deprecated as it was too cumbersome and we could not use it to cleanly handle cutouts.
To migrate to the new code is fairly simple, previously you would have set fullscreen through the following:
Application.service.setDisplayMode( ApplicationDisplayModes.FULLSCREEN );
This now becomes:
Application.service.display.setDisplayMode( DisplayMode.FULLSCREEN );
Brightness
You can set the screen brightness using the setBrightness() method. This method accepts a numeric value between 0 and 1, representing the percentage brightness from lowest brightness (0) to highest brightness (1).
Application.service.display.setBrightness( 0.4 );
Setting the brightness will attempt to set the system brightness levels on Android. This may present an authorisation dialog on certain versions of Android. If denied the brightness will only affect the current window and not the entire device.
You should add the following permission to your application:
<!-- To control the system screen brightness setting -->
<uses-permission android:name="android.permission.WRITE_SETTINGS" />