Icons, Launch Storyboards and the Assets Catalog
From iOS 11 Apple now requires a new process of adding icons to your application, you can no longer simply package them as you have done with previous versions of iOS and AIR. Instead you need to create an asset catalog (Assets.car file) and package in the root directory of your application.
Note: The
Assets.carfile is needed for iOS 11+ when you are using AIR SDK v28+
Additionallyu from iOS 13 Apple now requires a new process of adding launch / splash screens to your application, you can no longer simply package the "default.png" images in your application you have done with previous versions of iOS and AIR.
Note: Apple will soon enforce launch screens with the iOS 13 requirement so this will be a prerequisite for publishing in the AppStore
Contents:
- Method 1: Command Line
- Method 2: Using Xcode
- Method 3: Online Tool
- Packaging Asset Catalog
- Simple Launch Screen
- Supporting previous versions of iOS
Creating the Asset Catalogue
Method 1: AIR-ImageScripts
You will need a macOS machine with Xcode and imagemagik for this method, however the files can be transferred afterwards.
This is the method we prefer as it is simpler to update and create than having to drag files into Xcode. We have a script that downloads the required assets, resizes an icon and launch screen image appropriately and calls the xcode utilities to generate the Assets.car (and launch screen).
The script is available in the AIR-ImageScripts repository
You will need to have installed imagemagick and the xcode command line utilities (see details in the repository if you need help installing them).
To use it you will need to create 4 files for your icon. We require a foreground and background for your main icon so we can correctly create the adaptive icons for various situations. Then also a monochrome version of your foreground icon for themed environments and then a complete alternative icon to be used in dark situations on iOS.
These four base images are used to construct the icons for each of the platforms:
icon-foreground.png: should be a transparent icon with no background which will be layered over the background and centered on the launch imageicon-background.png: should be a filled image which constitutes the background of adaptive icons and the launch image (generally a solid colour)icon-monochrome.png: similar to the foreground icon except this should be monochrome and will be tinted by the OS to colour match the user's themeicon-dark.png: a specific dark image to be used as the dark icon on iOS
All of these files should be high resolution (we suggest 1024x1024)
Next create a launch.png launch screen image (we suggest a large 2732x2732 pixel image).
Place all these files in a directory and open a terminal at this location. You can either clone the repository and use the generateIcons script directly or call it as below:
/bin/bash -c "$(curl -fsSL https://github.com/distriqt/AIR-ImageScripts/releases/download/v2.0/generateIcons)"
Once complete this will have generated an out directory that contains
Assets.caryour asset catalogueLaunchScreen.storyboardcdirectory is your custom launch screen storyboardiconsdirectory containing icon images sized for AIRresfolder containing adaptive icons for Android
Copy these into your application as you require.
You can use the icons directory in your application descriptor by adding the following:
<icon>
    <image16x16>icons/icon16x16.png</image16x16>
    <image29x29>icons/icon29x29.png</image29x29>
    <image32x32>icons/icon32x32.png</image32x32>
    <image36x36>icons/icon36x36.png</image36x36>
    <image40x40>icons/icon40x40.png</image40x40>
    <image48x48>icons/icon48x48.png</image48x48>
    <image57x57>icons/icon57x57.png</image57x57>
    <image58x58>icons/icon58x58.png</image58x58>
    <image60x60>icons/icon60x60.png</image60x60>
    <image72x72>icons/icon72x72.png</image72x72>
    <image76x76>icons/icon76x76.png</image76x76>
    <image80x80>icons/icon80x80.png</image80x80>
    <image87x87>icons/icon87x87.png</image87x87>
    <image114x114>icons/icon114x114.png</image114x114>
    <image120x120>icons/icon120x120.png</image120x120>
    <image128x128>icons/icon128x128.png</image128x128>
    <image144x144>icons/icon144x144.png</image144x144>
    <image152x152>icons/icon152x152.png</image152x152>
    <image167x167>icons/icon167x167.png</image167x167>
    <image180x180>icons/icon180x180.png</image180x180>
    <image512x512>icons/icon512x512.png</image512x512>
    <image1024x1024>icons/icon1024x1024.png</image1024x1024>
</icon>
Method 2: Using Xcode
You will need a macOS machine with Xcode for this method to generate the Assets.car file
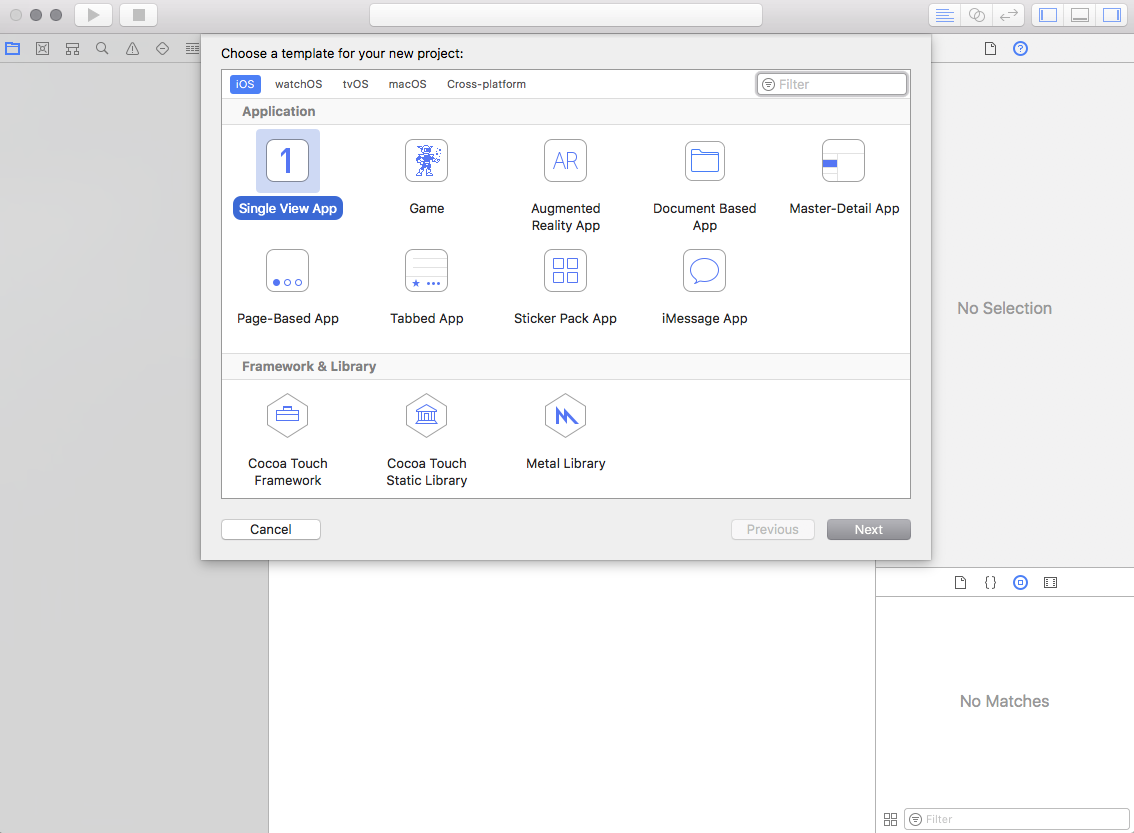
Firstly you will need to open Xcode and create a new application
- Start a new project and select the "Single View App" under the iOS section (or tvOS section if you are creating this file for a tvOS application).
- Fill Product Name, Organization Name and Organization Identifier (no specific names required).
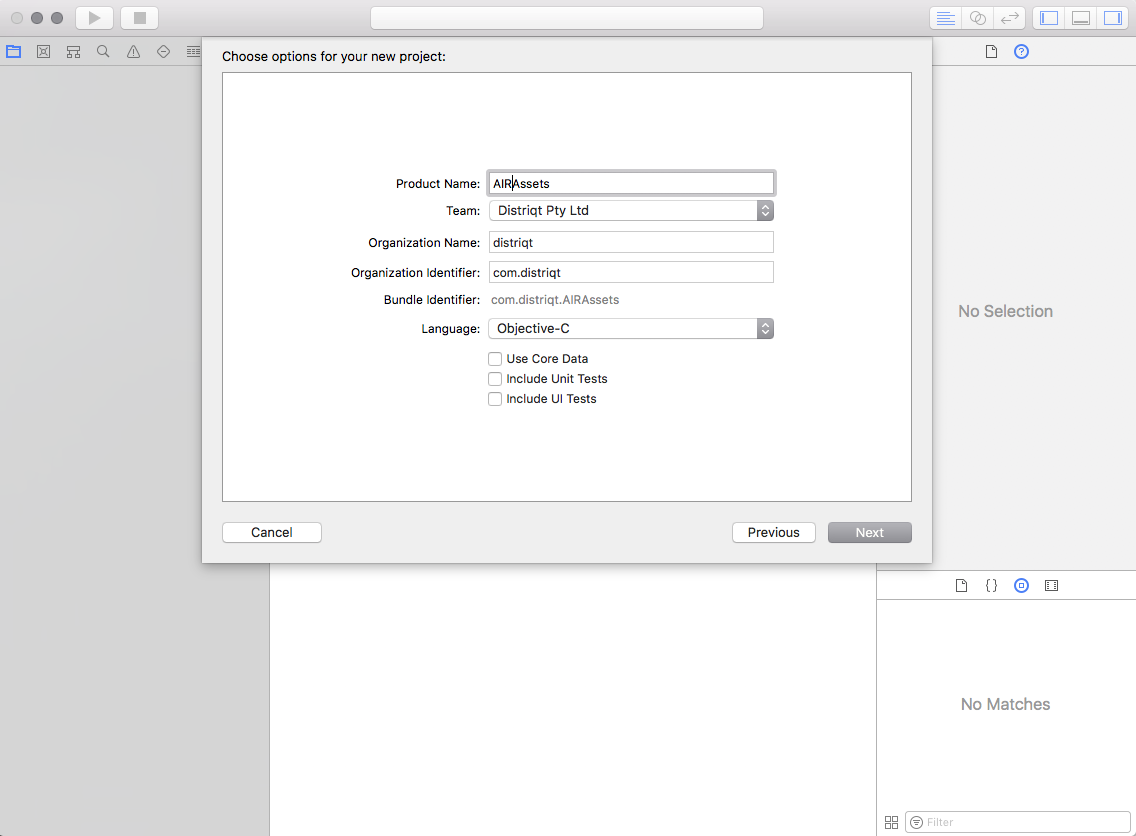
- Save the project
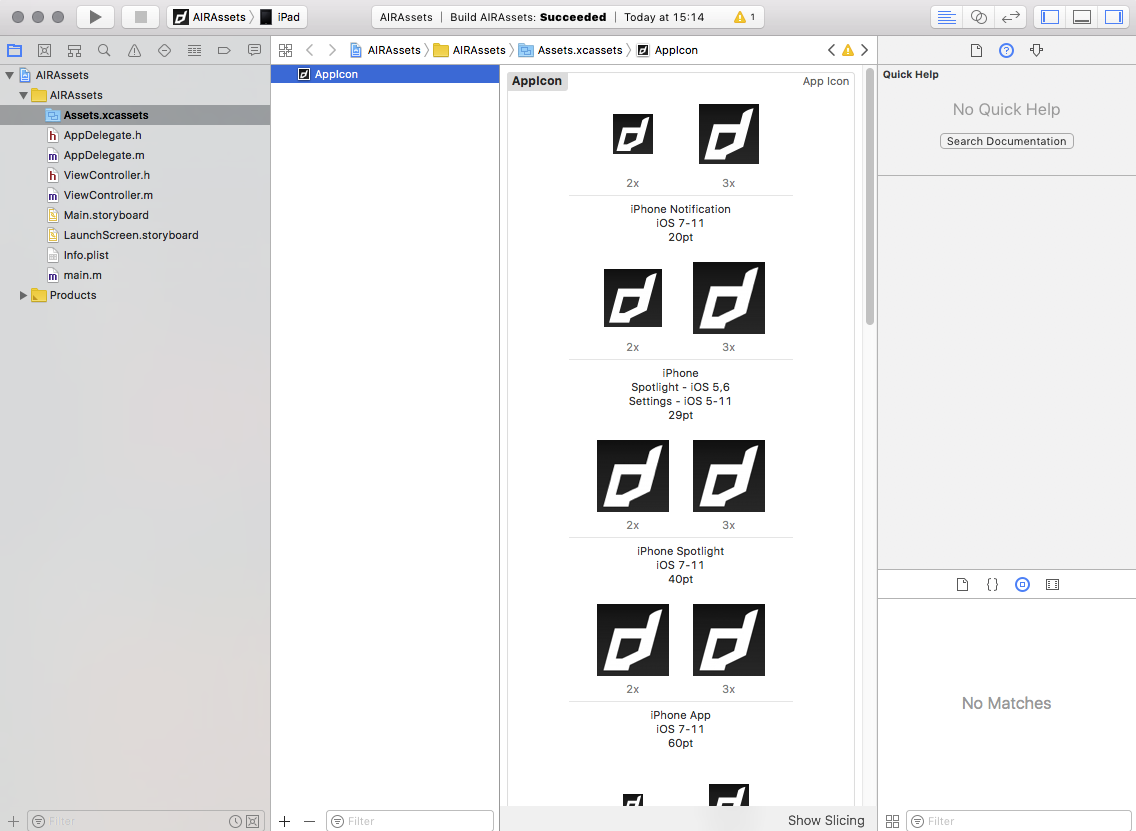
- In the left hand panel select the
Assets.xcassetsfile
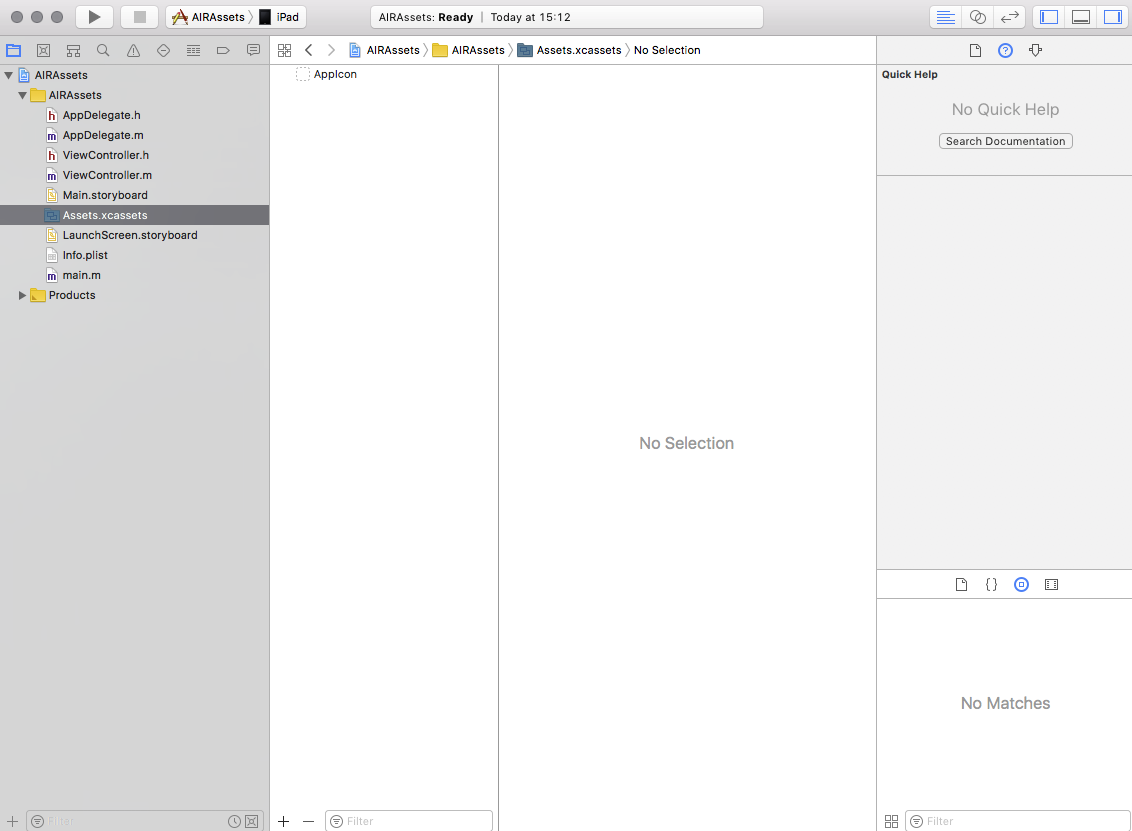
- Select the
AppIcon
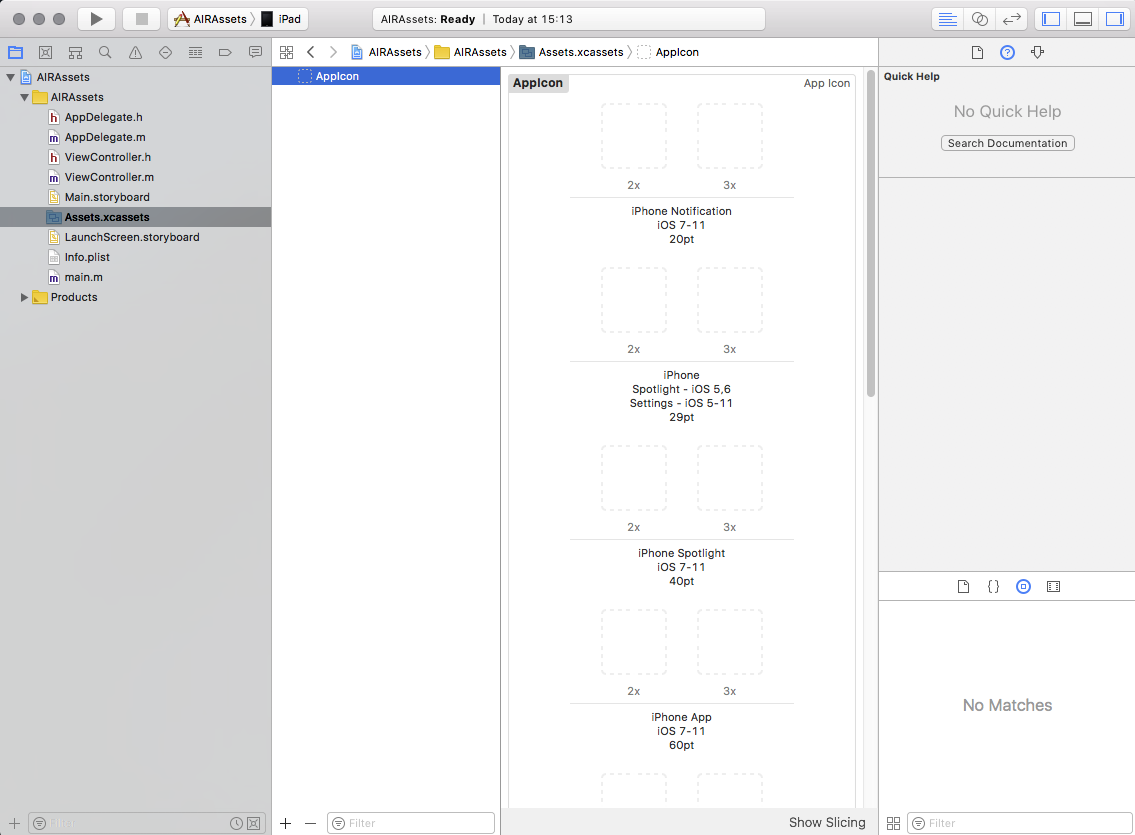
- Add all the required versions of the AppIcon
- Build the project ( Product -> Build).
- Right-click on your ‘.app’ -> Show in finder.
- Right click on your ‘.app’ -> Show package contents.
- Now copy
Assets.carand package with AIR application.
If you want to include a launch storyboard see here.
Method 3: Online tool
We do not recommend this approach as it can cause issues depending on your AIR developer license. This approach can miss resources required by the AIR SDK and cause your application to crash.
This is the simplest way if you are a Windows developer.
Simply go to the following url:
http://applicationloader.net/appuploader/icontool.php
and upload a 1024x1024 image of your icon. You will get a zip download containing the Assets.car file and all the icon sizes needed to embed in your iOS application.
Using this method you will not be able to add the LaunchImage so you will have to add a story board manually.
Packaging Asset Catalog
The Assets.car file must be placed at the root of your application, this means alongside your swf and other application content.
You do this by ensuring that it is in the root of your applications source and selected as a single file in your application package.
Simple Launch Screen
To simplify migration to launch storyboards we have created a simple storyboard that pulls an image from your Assets.car and aspect fills it to the screen. You will add a single image to your Assets.car alongside your application icons.
The AIR Image Scripts process above should have generated this launch screen for you.
Download this zip file and extract the LaunchScreen.storyboardc. Add it to your application and ensure it is packaged at the root level of your application alongside your Assets.car.
LaunchScreen.storyboardc is a directory but will appear as a "file" (package) on macOS
Add the following to the InfoAdditions node in your application descriptor:
<key>UILaunchStoryboardName</key>
<string>LaunchScreen</string>
That is all, you have now implemented a launch storyboard.
Launch images
This is no longer relevant as the minimum iOS version supported by new apps should support the launch screen approach and the default images are no longer required.
Recently Apple changed the supported names of the files for the default / launch images. Make sure you have correctly added the default images according to the Adobe docs:
http://blogs.adobe.com/airodynamics/2015/03/09/launch-images-on-ios-with-adobe-air/
Supporting previous versions of iOS
You must also make sure that you include the icons in your application using the icon tags in the application descriptor xml. This ensures that older versions of iOS still have the correct icons packaged and that other platforms still have the appropriate app icons.